
Bridging Assets: A Guide to PulseChain
Transferring assets across different blockchains is a fundamental operation in the decentralized world. A blockchain bridge is a service that connects two distinct blockchain networks. The PulseChain bridge is a crucial piece of infrastructure that allows users to move assets, particularly ERC-20 tokens, from the Ethereum network to the PulseChain network. This guide explains the process for moving your assets to PulseChain.
Preparing Your Wallet
Before you begin, you must set up a crypto wallet that can connect to both the Ethereum and PulseChain networks. MetaMask is a popular choice. If you don’t have MetaMask, you need to install it as a browser extension or mobile app.
Next, you must add the PulseChain network to your wallet. By default, MetaMask is connected to the Ethereum network. You need to add PulseChain as a custom network. You can do this by manually entering the network details or by using a service like ChainList that automates the process.
Here are the details for a manual setup:
- Network Name: PulseChain
- New RPC URL: https://rpc.pulsechain.com
- Chain ID: 369
- Currency Symbol: PLS
- Block Explorer URL: https://scan.pulsechain.com
You need the native token of the destination chain to pay for transaction fees. On PulseChain, this token is PLS. You must have some PLS in your wallet to perform any transaction, including the final step of a bridge transfer. You can obtain PLS by using a decentralized exchange on PulseChain after you have bridged your first asset over.
The Bridging Process
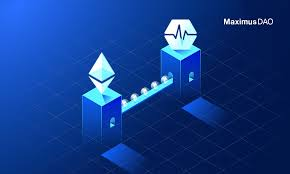
The process of moving assets involves a lock-and-mint mechanism. When you bridge a token from Ethereum to PulseChain, you send the token to a smart contract on Ethereum, where it is locked. A corresponding wrapped version of the token is then minted on PulseChain and sent to your wallet. This ensures the total supply of the asset remains consistent across both networks.
Here is a step-by-step guide:
- Visit the Official Bridge Site: Use the official PulseChain bridge to start the transfer. Always double-check the URL to avoid phishing scams.
- Connect Your Wallet: The website will prompt you to connect your MetaMask wallet. Authorize the connection. The bridge interface will recognize the network you are on. You should be on the Ethereum Mainnet to start.
- Select Assets and Amount: Choose the asset you want to transfer from the list of supported tokens, such as DAI or USDC. Then, input the amount you want to bridge. The interface will display your current balance of the selected token.
- Review and Confirm: The bridge will show you the estimated fees and the estimated transfer time. This includes the gas fees for the Ethereum transaction. Review all the information to ensure it is correct.
- Approve the Transaction: You must first approve the bridge contract to spend your tokens. This is a one-time transaction per token type. Your wallet will ask for your approval. Once you approve, you can proceed with the main transaction.
- Initiate the Bridge: After approval, confirm the transaction to send your tokens to the bridge contract on Ethereum. You must pay an ETH gas fee for this transaction. The transaction will be broadcast to the Ethereum network.
- Wait for Confirmation: You need to wait for the transaction to be confirmed on the Ethereum network. This can take a few minutes depending on network traffic. The bridge’s validators will monitor the transaction.
- Receive Wrapped Tokens: Once the validators confirm your transaction, the bridge system will mint the wrapped tokens on PulseChain and send them to your wallet. These tokens will appear in your wallet on the PulseChain network. The wrapped token will have a “p” prefix, for example, your DAI becomes pDAI.
You might need to add the contract address for the new wrapped token to your wallet to see it in your assets list. You can find these addresses on the PulseChain block explorer.
Important Considerations
- Security: Always use the official bridge. Phishing websites that mimic the bridge’s interface are a threat.
- Transaction Fees: Remember to have enough ETH in your wallet to pay for the initial gas fees on the Ethereum network. You must also have PLS in your wallet on the PulseChain side to perform any transactions with your new assets.
- Transaction Time: Bridge transfers are not instant. The time a transfer takes depends on network congestion on both blockchains.
- Wrapped Tokens: Understand that the tokens you receive on PulseChain are wrapped tokens, not the original asset. They are a representation of the original asset and are redeemable at a 1:1 ratio.
- Reverse Bridging: The process for moving tokens back from PulseChain to Ethereum is the same, but in reverse. You send the wrapped tokens back to the bridge on PulseChain, where they are burned, and the original assets are unlocked and returned to your wallet on Ethereum.
Bridging assets to PulseChain opens up a new world of decentralized applications and services with lower fees. By following this guide and taking necessary security precautions, you can confidently move your tokens to the network.