
Rubber Roofing Explained: Everything You Need to Know About EPDM Roofing
Not sure which roofing material to choose for your next project? Whether you’re a DIY enthusiast, a homeowner looking to upgrade, or a contractor on the hunt for durable solutions, rubber roofing deserves your attention. Cost-effective, versatile, and long-lasting, rubber roofing has become a favorite choice for flat and low-slope roofs.
By the end of this guide, you’ll learn what rubber roofing is, its advantages, installation tips for DIY roofing projects, and how EPDM roofing can minimize maintenance headaches.
What Is Rubber Roofing?
Rubber roofing, also known as EPDM roofing, is a type of roofing membrane made primarily from synthetic rubber. EPDM stands for Ethylene Propylene Diene Monomer, a material known for its durability, flexibility, and ability to withstand tough weather conditions.
This roofing option is commonly used for flat or low-slope roofs but can also enhance sheds, garages, and even small residential areas. It is typically sold in large rolls or sheets, making it easy to handle during installation.
Types of Rubber Roofing Materials
Rubber roofing comes in a few variations, allowing you to choose the best material for your specific needs.
- EPDM Roofing: The most common and widely used rubber membrane due to its affordability and flexibility.
- TPO Roofing (Thermoplastic Polyolefin): Known for energy efficiency but generally more expensive than EPDM.
- PVC Roofing: Offers strength and resistance to chemicals but comes at a higher price.
For most residential and DIY projects, EPDM roofing is the go-to choice thanks to its balance of cost and performance.
Benefits of Rubber Roofing
Why is rubber roofing growing in popularity among DIYers and professionals alike? Here are some of the reasons EPDM and rubber membranes stand out.
1. Durable and Weather Resistant
Rubber roofing is designed to endure extreme weather conditions. Whether it’s blistering heat, heavy rains, or freezing temperatures, EPDM roofing can handle it all without warping, shrinking, or cracking.
2. Cost-Effective
Compared to materials like asphalt shingles or metal roofing, rubber roofing is generally more affordable, particularly for flat roofs. Plus, its longevity reduces maintenance and replacement costs in the long run.
3. Eco-Friendly Option
If sustainability matters to you, rubber roofing is an excellent choice. Many EPDM roofing materials are made from recycled materials and can be recycled again at the end of their lifespan.
4. Low Maintenance
Forget the regular patchwork that some roofing materials demand. EPDM rubber roofs require minimal maintenance, as the material is resistant to leaks and punctures.
5. Easy to Install
For DIY enthusiasts, rubber roofing is a dream material. Its lightweight structure and large sheets make it much simpler to install compared to traditional shingles or tiles.
Rubber Roofing vs. Traditional Roofing
If you’re debating whether to stick with traditional options like asphalt or explore rubber roofing, here’s a quick comparison to help you weigh your options.
| Feature | Rubber Roofing (EPDM) | Traditional Asphalt Shingles |
| Durability | Up to 50 years | 15–30 years |
| Flexibility | High (handles temperature shifts) | Moderate (prone to cracking) |
| Cost | Moderate | Low |
| Eco-Friendliness | High (recyclable material) | Moderate |
| Installation Complexity | Easy for DIYers | Requires more effort and time |
For flat roofs, rubber roofing is undoubtedly the smarter option, especially if longevity and ease of installation are priorities.
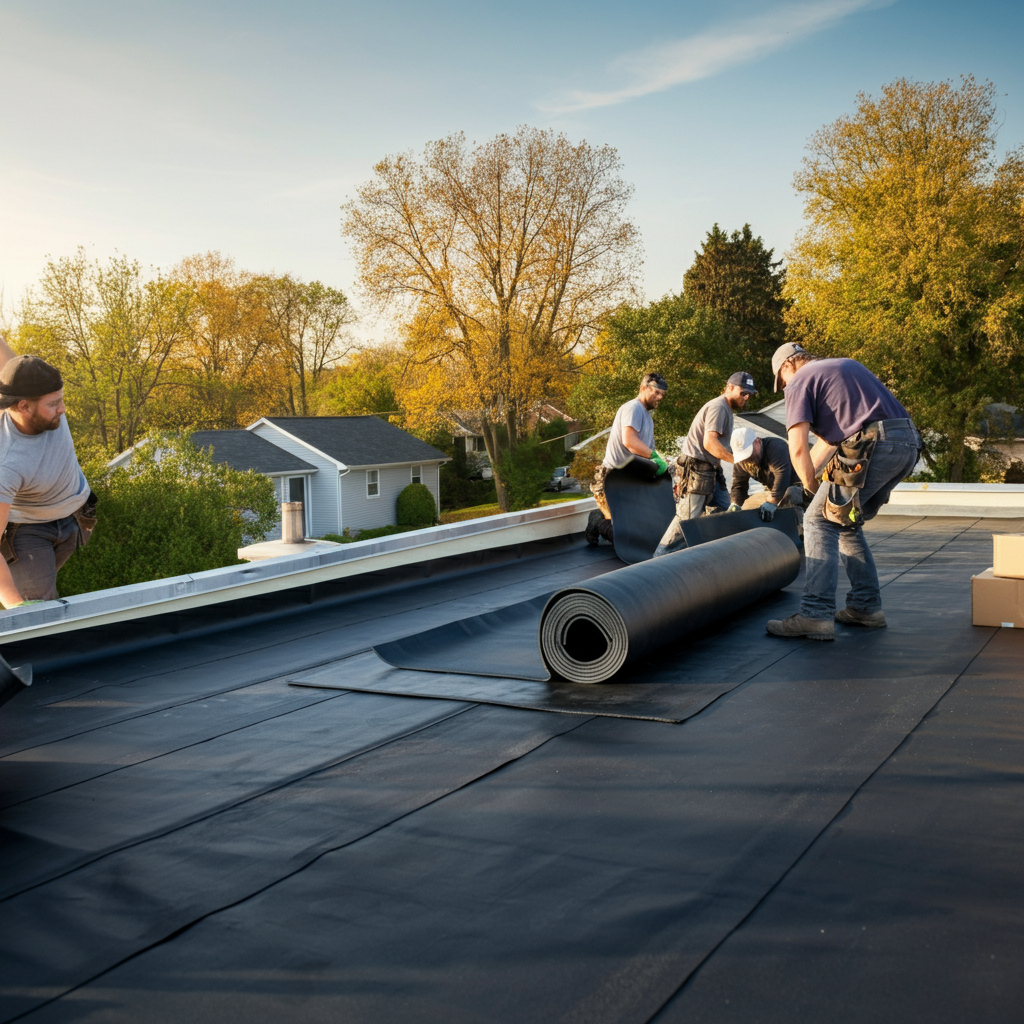
Basic Steps for DIY EPDM Roofing Installation
One of the biggest reasons EPDM roofing is popular among DIY enthusiasts is that you don’t need years of experience to install it. Here’s a simplified guide to help you get started on your first rubber roofing project.
Step 1: Gather Your Tools and Materials
Before getting started, ensure you have everything you need to complete the project, including:
- EPDM rubber sheets
- Adhesives (water-based or acrylic-based)
- A roofing roller
- Utility knife
- Primer and seam tapes
- Measuring tape
Step 2: Prepare Your Roof Surface
Clear your roof of debris, dirt, and old roofing material. A clean, smooth surface ensures the adhesive bonds properly to the rubber sheets.
Step 3: Measure and Cut the EPDM Sheets
Measure your roof area and cut the EPDM sheets to fit. Always leave a slight overhang along the edges, as you’ll trim the excess later.
Step 4: Apply Adhesive
Carefully adhere the EPDM sheet to the roof using the adhesive. Work in sections, applying the adhesive to the roof surface and pressing the rubber sheet in place. Use the roller to smooth out wrinkles and ensure a strong bond.
Step 5: Seal the Seams
Use primer and seam tape to seal the edges where two sheets overlap. This will prevent leaks and ensure a watertight installation.
Step 6: Trim Excess Rubber
Finally, use a utility knife to trim any overhanging rubber and ensure your roof looks neat and tidy.
Tips for Maintaining Your Rubber Roof
Even though rubber roofing is low maintenance, a little care can go a long way in extending its lifespan.
- Regularly Inspect Your Roof: Check for any signs of damage or punctures after severe weather.
- Clean Occasionally: Remove debris and rinse your roof with mild soapy water to prevent dirt buildup.
- Patch Small Tears Promptly: If you notice minor damage, use an EPDM patch kit to fix it before it worsens.
Thinking About Rubber Roofing?
Rubber roofing, particularly EPDM, offers a winning combination of affordability, durability, and ease of installation. Whether you’re a DIYer, homeowner, or contractor, it’s an excellent choice for flat and low-slope roofs.
Want to take the next step? Browse the wide selection of EPDM roofing materials at your local hardware store or construction supplier and start your project today!